
Getting Started Step Three: Groups
If you are reading this step, you should have completed Getting Started Step Two: Courses. If not, please follow along with that guide first.
In this guide, we will look at an important aspect of any Degree Plan-- Groups (also known as "elective groups"). These are collections of courses which the student or advisor can select from, to fulfill a specific requirement.
For example, let's say you have a degree with an elective group called "Humanities", with 5 possible options, and the student should select 2 courses.
For the purposes of this guide, we will make a very simple group, containing only 2 courses. But know that FlightPath is capable of more complex groups, even groups which change their options based on what the student has previously taken.
Let's get started.
Visit the Admin Console, scroll to the bottom, and click the Groups for [catalog year] link.
The page that loads will contain all the groups which have been created for FlightPath. If this is your first time setting it up, the page should be empty.
Begin by clicking the "Add a new group to this year" link at the top of the page.
A form should load which looks like this:
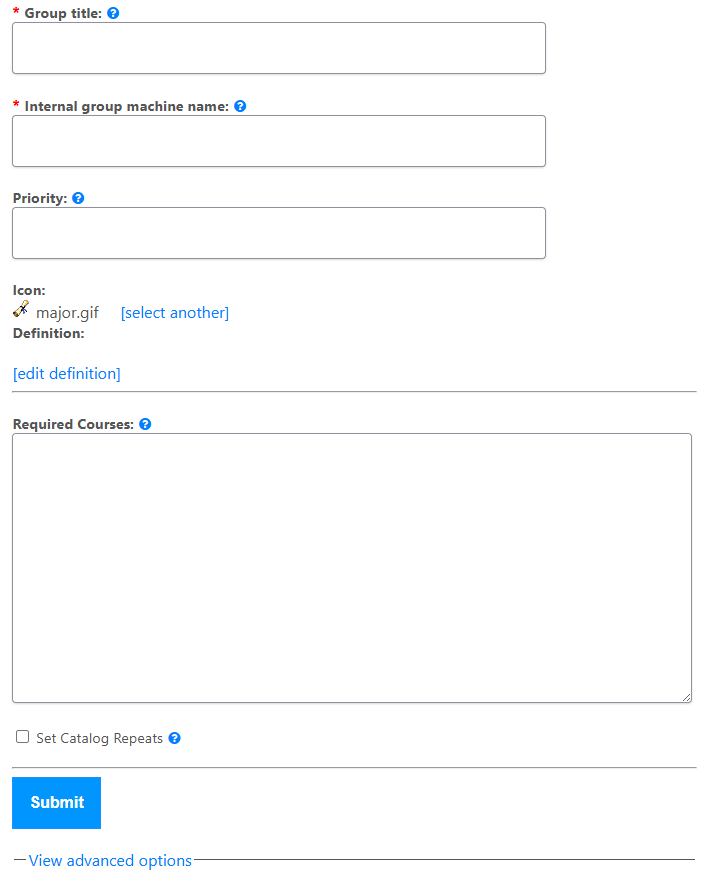
First, let's go over what these fields mean.
- Group title
- This is what the student and advisor will see in FlightPath. Ex: "Art Electives"
- Internal group machine name
- Every group in FlightPath is identified by a unique "machine name", which is used to distinguish between groups with the same Title. The machine name is never seen by the typical user.
- The field must be unique within each catalog year, and consist of only letters, numbers, and underscores ( _ ). Ex: art_electives
- Note: When you go to save the form, if the field is not unique or valid, FlightPath will alert you to that fact with a message.
- Priority
- It's often that a course might be able to fit into more than one group. For example, ART 101 might appear in both "Art Electives" but also "Free Electives". FlightPath needs to know, in these cases, which group takes priority and can claim the course first.
- The higher priority number means it will fill in first. A lower priority number means it will fill in last.
- Ex: Art Electives might be set to 100, and Free Electives might be set to 0
- If unsure what to enter, use "50" for most groups. This gives you room to go back and change some to "30" or "45" or "65", etc., as needed.
- It's often that a course might be able to fit into more than one group. For example, ART 101 might appear in both "Art Electives" but also "Free Electives". FlightPath needs to know, in these cases, which group takes priority and can claim the course first.
- Icon
- On a degree plan, FlightPath displays groups with an icon next to it. There are various built-in icons, and these can also be added to later on as well. This field lets you select an appropriate icon for the group.
- Edit Definition
- "Definitions" are a powerful way to build complex and very long lists of courses, without having to type everything out by hand. See this documentation page for more information.
- Required Courses
- Typically, each course in a group is entered one-per-line.
Example:
ART 101
ART 112
ART 115 - FlightPath can also manage concepts like "branches" in groups, where a student's previous courses affect their options. See this page for more details.
- Note: Courses which may be repeated need to be specifically indicated, using the number of repeats in brackes. This is known as a "specified repeat".
Ex: ART 101 [2]- This means that ART 101 may be taken twice and can "fill in" to this group twice. Just make sure that ART 101 is allowed to be taken more than once, based on its "Repeat hours."
- There are other interesting actions which this box can do; click the "?" icon next to it to see a list. Ex: "hidden" and "recommended" courses.
- Typically, each course in a group is entered one-per-line.
- Set Catalog Repeats
- If checked, FlightPath will automatically look at the list of Required Courses and apply "specified repeat" values (eg, [2]) to the course, based on its repeat hours set previously in the Courses section.
- In a typical group, this is unchecked.
To continue our demonstration, enter the following data:
- Group title: Upper Level Demo Electives
- Internal group name: upper_level_demo_electives
- Priority: 50
- Icon: Click this and select any icon you like for this group.
- Select any icon you like. This list is created from the icons you have in your theme's /icons/ folder.
- Required Courses: enter one per line, these courses: DEMO 345 (press enter) DEMO 401
- Each line in this box represents a possible choice for the student to take. Your box should now look something like this:
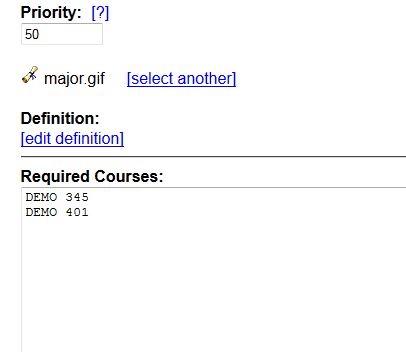
- Each line in this box represents a possible choice for the student to take. Your box should now look something like this:
Scroll to the bottom and press the Submit button. The page will reload, and tell you that the group has been saved correctly.
You may now move on to the next guide.