
Next Steps - Adding Student Courses & Substitutions
Now that you have completed the Getting Started series, this "Next Steps" series will cover some of the other features of FlightPath, which may require a little more work.
On this page, we will discuss how to add student courses, meaning, courses which the student has taken for credit.
Important: The screenshots you will see in this guide are using data from the version 5.x of the Sample Data module, and from FlightPath 5.x itself (which is now out of date). However, the information can be easily adapted to the data in the Getting Started guide and the latest version of FlightPath. At the moment, the Sample Data module is not compatible with FlightPath 6.x or above.
Add some more courses
Let's begin by adding a few more courses to FlightPath, just so we have some extra data to work with.
Add the following courses to the 2012-2013 catalog year: MATH 110 (3 hours), MATH 111 (1 hour), MATH 212 (3 hours). Remember to apply draft changes!
Add courses to students' records
Our goal is to tell FlightPath the our test student took these 3 new courses, and is enrolled in a current one.
There are 2 ways to do this. Either through the UI (available in FlightPath version 4.8 and above), or by editing the database directly.
First, let's explore how you would do this in the UI:
Adding student courses through the UI
Begin by visiting the Admin Console. Go to the Users option, and search for your same student user. Your screen should look something like this:
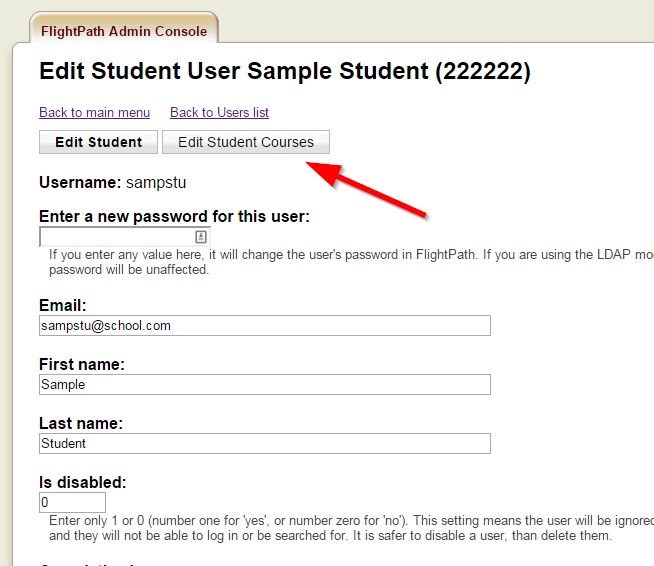
Click the "Edit Student Courses" button. You will be taken to a screen where you may now enter what courses the student has enrolled in, what grade they made, etc, as shown below:
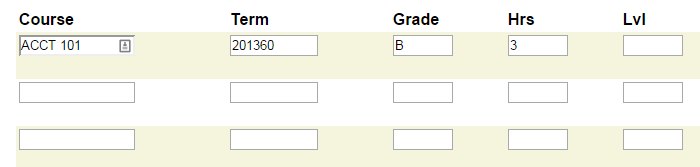
From here we can manually manipulate the course data for this student. This technique might be best for small-scale situations, but for a larger set of data, you will want to manipulate student courses directly, at the database level, as described in the next section.
Adding student courses through the DB
In a production environment, you would probably do this in either a nightly routine, or use something like the Banner Integration module to pull this data live from another source.
But for the purposes of this guide, we will edit the database directly, by hand.
I am using a product called Navicat, but any database tool will work (for example, phpMyAdmin), and you will see similar-looking screens.
- Begin by pulling up our test student in FlightPath. Note: I am using the Sample Data module's data, so my screen will look a little different, and it will be using ACCT courses instead of DEMO courses, but the basic idea is the same.
- Your screen should look similar to this:
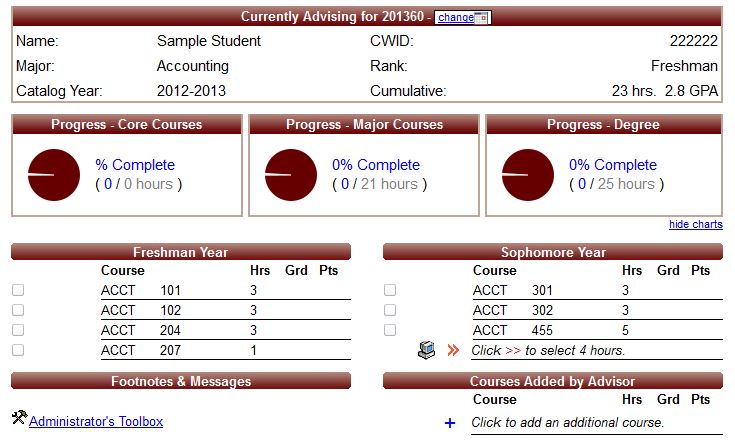
- Notice that for this student, their CWID is 222222.
- Open up the FlightPath's database in your database editor.
- Open the student_courses table.
- Add the following row to the student_courses table:

(enter NOTHING for the "id" field, it will auto-increment when you save the record.)
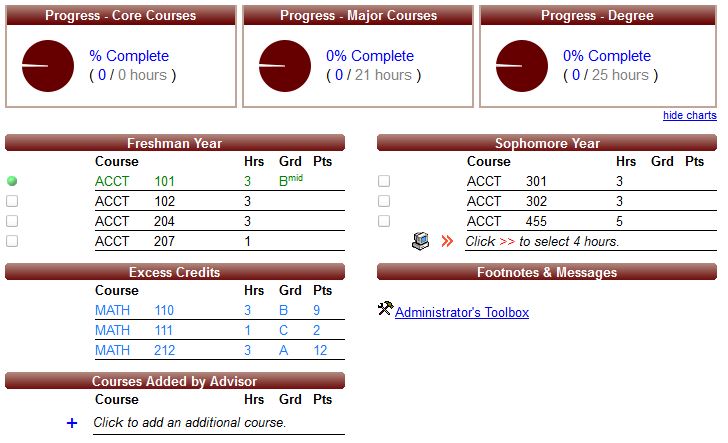
Note: if you are using data from the Getting Started guide, then use DEMO 101, instead of ACCT 101. And use whatever CWID you have for the student_id. - Refresh the page, and you should now see something like this:
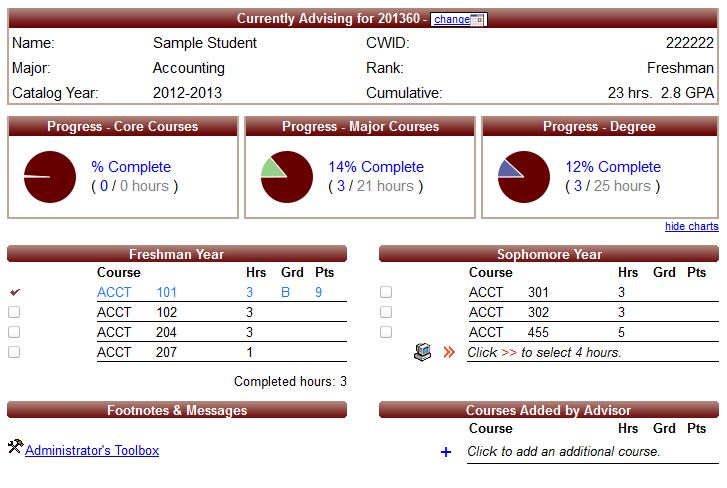
- Notice that the course we added now "fills in" to the degree plan. It appears in blue, meaning the student has completed the course. We also see the pie charts have changed to indicate some progress through the degree.
- Now, for fun, let's see what happens if we change the student's grade to an F, meaning they did not complete the course.
- Edit this record again, in the student_courses table, but change the grade to "F". Then refresh FlightPath. You should see this:
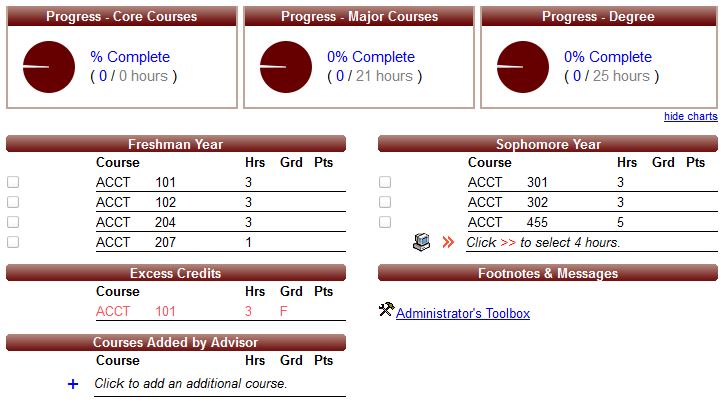
- Notice that the course does not "fill in" to the degree plan, and is now listed in red in Excess Credits. That is because in our System Settings (step One of the Getting Started guide), we said that "F" and "W" were both "Retake grades", meaning FlightPath will not accept courses with those grades on the degree plan.
- One last experiment: Let's change the grade again to "E", which is our pseudo-grade meaning "enrolled". You should wind up with a screen that looks like this:
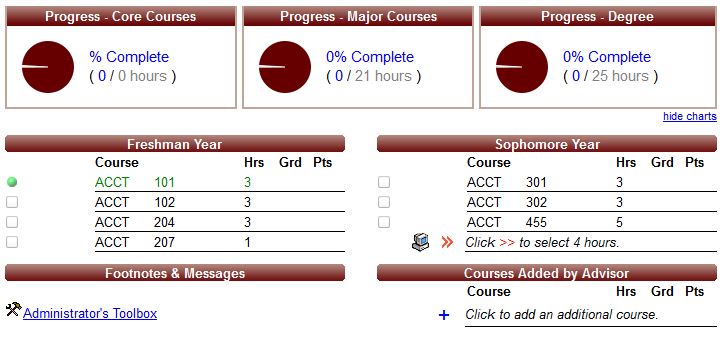
- Notice that now, the course shows up in green, with no grade, and a little green dot to the side. This is how FlightPath denotes that the student is "enrolled" in the course, and currently taking it, and hasn't yet earned credit.
- Notice, too, that the pie charts are unaffected. That is because the pie charts only take into account completed courses.
- Using this system, when courses are read into FlightPath, you should assign courses the grade of "E" (or any of the Enrolled grades from the System Settings page, where you can make up your own pseudo-grade if you want) to denote the student is currently taking the course. This is done automatically by the Banner Integration module.
- One more feature to show is that FlightPath can also show "midterm" grades. If you school records grades for students at midterm, those grades can also show up in FlightPath. Not every school does this, so if this does not apply to you, please ignore.
- To assign a midterm grade, of B for example, change the grade to BMID. On the System Settings page we noted this was also an "Enrolled" grade. When you reload the page, you should see this:
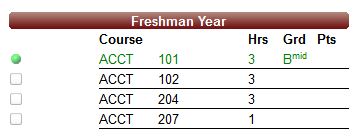
- Notice that the grade appears with a "mid" as a superscript, denoting this is a midterm grade.
Substitutions
To experiment with substitutions, it is helpful to have some courses in Excess Credits. That is why I had you create the 3 MATH courses earlier.
- Add them now to the student_courses table for this student, with the appropriate hours for each course (MATH 110 3 hours, MATH 111 1 hour, MATH 212 3 hours). Give them any grade you would like, but keep the term_id 201360 for simplicity.
- Note that you can actually set any hours you like under "hours_awarded" and FlightPath will accept it.
- You should now see something like:
- Notice that the courses appear under Excess Credits, and the pie charts are unaffected by their addition. This is because for this degree plan, there are no MATH requirements, so they do not "fill in."
- Let's substitute MATH 111 for ACCT 207. (or DEMO 207 if you are using data from the Getting Started guide)
- Click on ACCT 207, and a popup will appear with the description. At the top will be a "Substitute" tab. Click it, and you should see the follow screen:
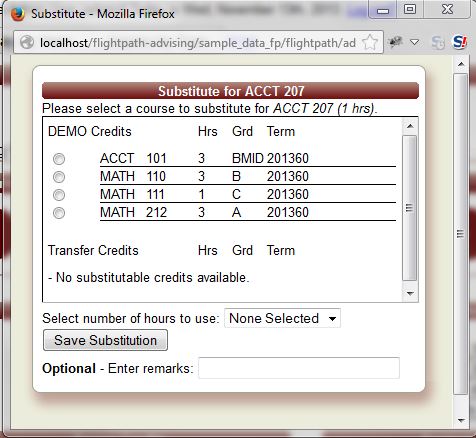
- This window is showing us the available courses we could substitute for the requirement of ACCT 207. Select MATH 111, and click Save Substitution. The window will close, and the main screen will reload to show the following:
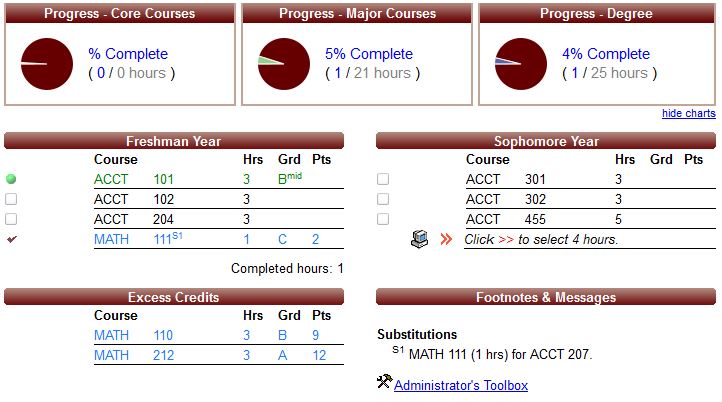
- Notice that our MATH 111 now appears inside the Freshman Year block, where ACCT 207 used to be, with the superscript "S1". We also see a new footnote at the bottom right, showing that the footnote "S1" refers to our substitution.
- We also see that our pie charts have changed, now showing that progress toward the degree has been made, since we have a substitution in place.
- We can remove the sub by clicking the MATH 111, and cllicking the "Remove substitution" link in the popup.
- There are more advanced things we can do with substitutions, too. For example, we can "split" substitutions, where a 3 hour course can have just 1 of its hours applied. Or, a 1 hour course can be subbed for a 3 hour course, leaving 2 hours remaining. Please feel free to experiment until you are comfortable with substitutions.