Getting Started Step Seven: Advising
We can now actually search for our student, and advise them. If you wish, you can log in as the advisor user you just created, but since the admin user always has all of the permissions, let's stay logged in as admin for now.
But first-- an important word about FlightPath's cache:
To save time, FlightPath will "cache" data for a student and their degree, when they are loaded. If you make changes to the student, or to the degree, don't forget to apply draft changes (for the degree), and reload the student, by simply searching for them again. This will cause FlightPath to clear it's cache.
If you make changes to course data, you will need to clear all of FlightPath's cache from the Main Tab (if you are admin), or simply log out and back in, as FlightPath caches course data on login.
Advising a Student
Get to the main tab of FlightPath (not in the Admin Console) and search for our Test Student by name or the CWID you gave them.
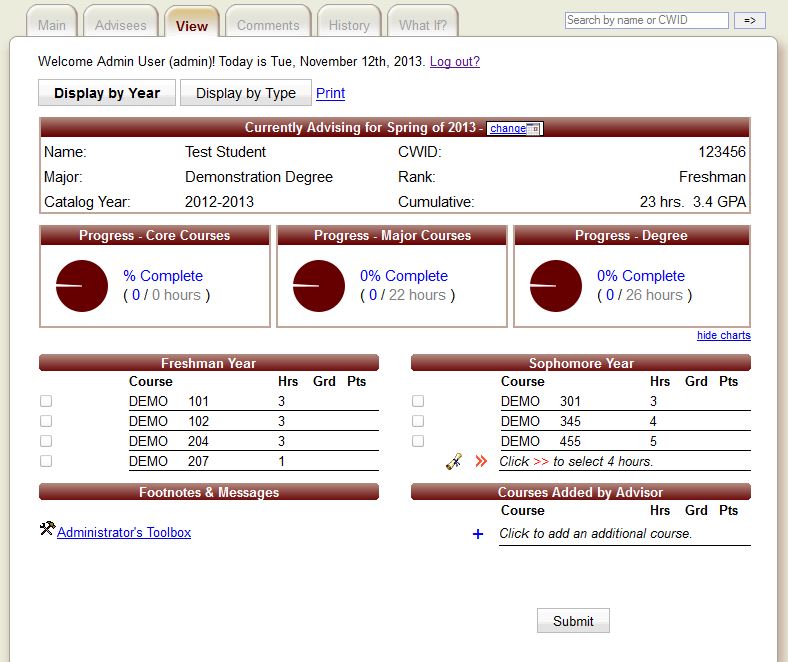
Since there will only be one result, the page will automatically load to their degree plan. Your screen should look something like this:

We can see how our courses and groups now appear, ready for us to advise our student. To advise, all you need to do is check the box of the course you wish for them to take, then click the Submit button at the bottom of the screen.
Feel free to also leave comments for the student, by way of practicing.
This now concludes the basic "Getting Started" guide.
